
eAtlas Image Metadata Editor Application - Tag photos with metadata
Version 0.8.1 - 18/05/2015
The eAtlas Image Metadata Editor application is a Java program that allows information about the photos, such as title, description, attribution, location, etc., to be recorded and saved in the images themselves. When these images are then uploaded to the eAtlas this metadata is then maintained and displayed on the site. A web page is created for each image using the metadata added to the photo by the Image Metadata Editor. This application is intended to be used by eAtlas content administrators and those wishing to submit lots of photos to the eAtlas.
The metadata is recorded in the photo files themselves and so this information is maintained when they are copied across computers.
The eAtlas Image Metadata Editor application allows the metadata to be edited for individual images or handled in bulk by using its Export EXIF to CSV and Import EXIF from CSV.
Note: The Image Metadata Editor can only attach metadata to JPEG images, not PNG or PDFs. If you have a bunch of PNGs to submit then you can convert these to JPEGs using a bulk convertion tool as part of the Image Metadata Editor.
How to use the Image Metadata Editor tool
-
Install Java
The Image Metadata Editor is a Java FX application. You will need Java 7 or higher to be able to run it. Please, visit Oracle website to install a recent version of Java if you don't already have it installed. -
Make a backup of your images
The Image Metadata Editor is very stable and reliable. But, as any other programs, it may happen to fail during its execution, which may lead to file corruption. Even if this is very unlikely, it's preferable to create a backup of your images before modifying their metadata. -
Download the Image Metadata Editor tool
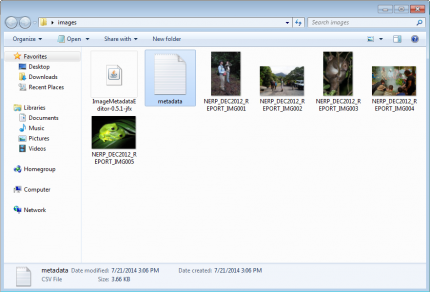
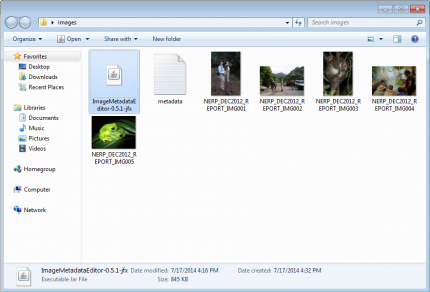
Save the Jar file to a convenient place to later run the application. The tool is easier to use when it's located in the same folder as the images. Copy the tool inside the folder containing the images. The tool does not need any installation. It should run directly if Java is installed.Where to copy the Image Metadata EditorCopying the Image Metadata Editor in the images folder.
 by Gaël Lafond (eAtlas)
 -
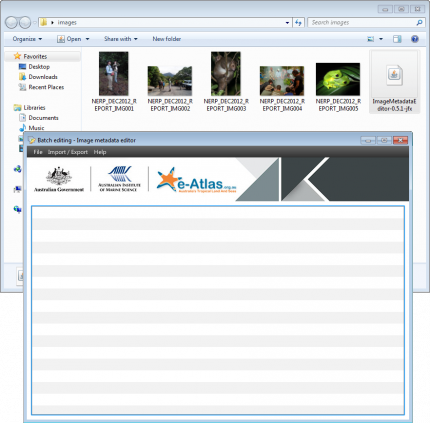
Run the Image Metadata Editor
Double click the Image Metadata Editor icon to run the tool.Execution the Image Metadata EditorRun the Image Metadata Editor by double-cliking it.
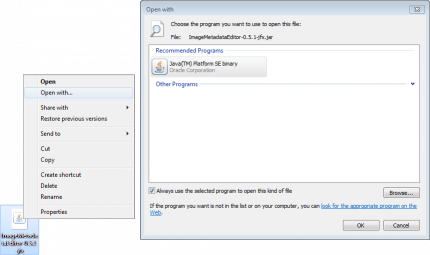
by Gaël Lafond (eAtlas)If it doesn't run, try to "Right-click" it and select the option "Open with...". Windows should offer you the option to open the tool using "Java".
Execution the Image Metadata Editor manuallyExecution the Image Metadata Editor manually.
by Gaël Lafond (eAtlas)If this option is not listed, you will have to install Java (Step 1).
NOTE: The Image Metadata Editor tool is safe to use. It does not install any files on your computer and does not share any personal information over the internet. -
Load your images in the tool (Note: JPEGs only, use conversion tool for PNGs, see below)
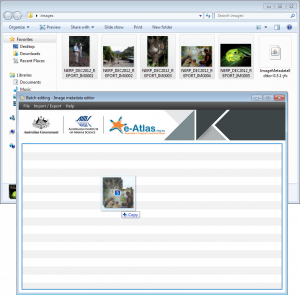
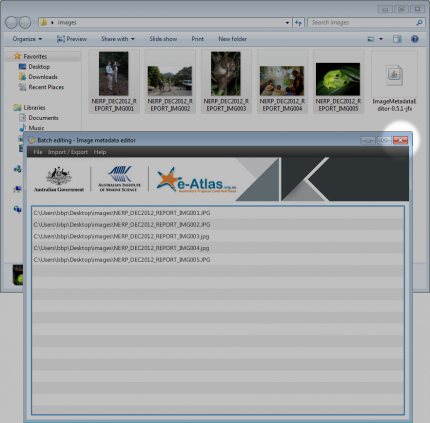
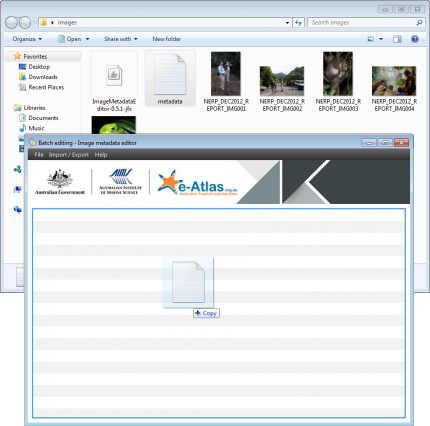
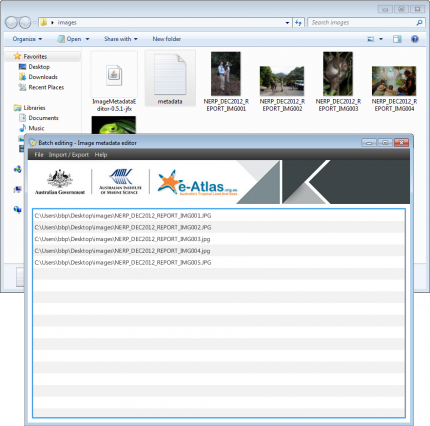
Simply "Drag and drop" all your images in the center of the application.>Loading images in the Image Metadata EditorLoading images in the Image Metadata Editor.
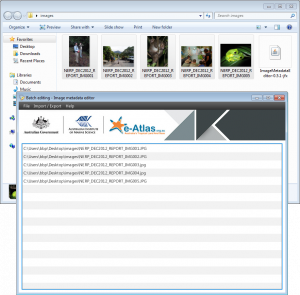
by Gaël Lafond (eAtlas)Images loaded in the Image Metadata EditorImages loaded in the Image Metadata Editor.
by Gaël Lafond (eAtlas)NOTE: Only JPEG images has support for EXIF metadata. If you wish to submit PNG or GIF images then the editor has a bulk conversion tool. See the section on converting PNG images below. For PDF, etc., please use the e-Atlas Image Submission Form.
-
Edit the images metadata
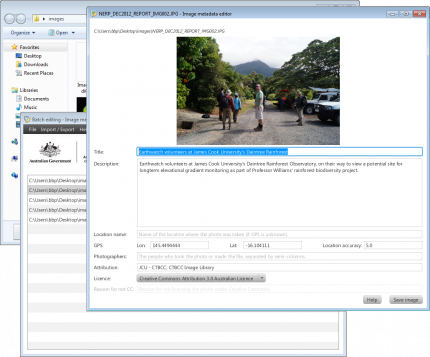
You can either edit the metadata of each images one by one, or export the metadata as a CSV file that you can edit using a spreadsheet editor. To edit the image metadata individually, simply double click a file from the list. Edit the metadata, and apply them to the image using the save button to the bottom right corner.Editing the metadata of an image using the Image Metadata EditorEditing the metadata of an image using the Image Metadata Editor.
by Gaël Lafond (eAtlas) -
Edit all images metadata in bulk (CSV)
If you have many images to edit, exporting the metadata as CSV is probably a better idea. It may save you considerable time, especially if some metadata are the same for each images, like the photographer for example. -
Export as CSV
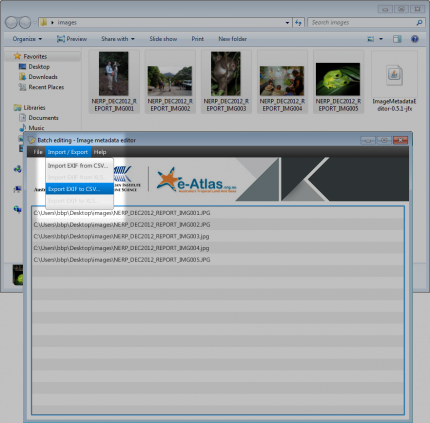
After loading all your image in the Image Metadata Editor, go to the "Import / Export" menu and choose "Export EXIF to CSV..."Exporting images metadata using the Image Metadata EditorExporting images metadata using the Image Metadata Editor.
by Gaël Lafond (eAtlas)Choose a name for the file, using the "csv" extension. For example: "metadata.csv". Save the file in the same folder as the Image Metadata Editor tool. The location of the CSV file is important, it will determine the starting point for the file path of every images.
Exporting images metadata using the Image Metadata EditorYou will need to provide a filename for the CSV file when exporting images metadata using the Image Metadata Editor.
by Gaël Lafond (eAtlas)You can quit the Image Metadata Editor for now.
Closing the Image Metadata EditorYou can close the Image Metadata Editor by clicking the X button in the top right corner or by choosing "Quit" from the "File" menu.
by Gaël Lafond (eAtlas) -
Open the CSV file using a spreadsheet editor such as Excel or LibreOffice
Double click the "csv" file saved in the previous step. It should open using your default spreadsheet editor.If you do not already have a spreadsheet editor installed, you will need to install one. We suggest you to install LibreOffice, because it is free and easy to install.
LibreOffice official website
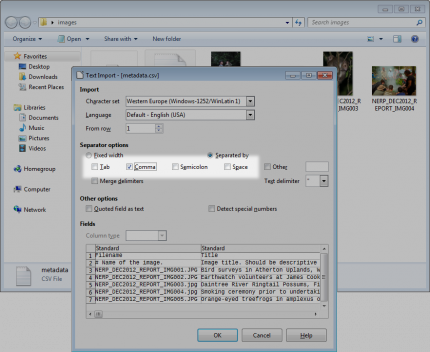
Once it's installed, open the CSV file using LibreOffice. Ensure that you only have "Comma" selected in the "Selector options".Loading a CSV file in LibreOfficeWhen you open a CSV file using LibreOffice, you have to ensure that you only have "Comma" selected in the "Selector options".
by Gaël Lafond (eAtlas) -
Edit the metadata
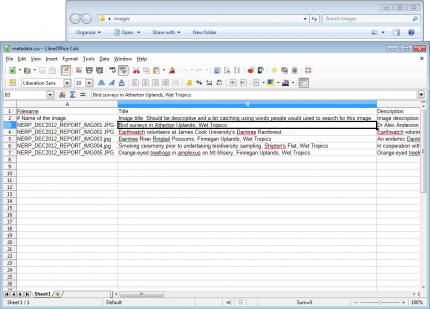
Add the metadata in the spreadsheet. Each column has a description to which tells you what information expect. You can add columns if you desire, but don't reuse the existing column names. These extra columns can be used to bring in additional data that is used in spreadsheet formulas to generate the metadata for the photo. These extra columns are ignored by the Image Metadata Editor.Editing images metadata in LibreOfficeEdit the images metadata in a spreadcheet editor like Excel of LibreOffice. You may add new columns as long as the columns title stay unique and unchanged (first row) and the "Filename" stay first in the first column.
by Gaël Lafond (eAtlas)When you are done, same the file. If you have used spreadsheet formulas then save it as both a native spreadsheet file (.xls for example) then also save it as a CSV file. The spreadsheet file will remember the formulas and the CSV file is what is needed by the Image Metadata Editor.
-
Run the Image Metadata Editor again
Double click the Image Metatada Editor icon to re-launch the application.Selecting the Image Metadata EditorRun the Image Metadata Editor by double-cliking it.
by Gaël Lafond (eAtlas) -
Load the edited metadata CSV file
Drag and drop the edited CSV file in the Image Metadata Editor.Loading a CSV file in the Image Metadata EditorDrag and drop the CSV file in the Image Metadata Editor to load it.
by Gaël Lafond (eAtlas)You will see all your image files, loaded back in the application.
CSV file loaded in the Image Metadata EditorOnce the CSV file is loaded, the Image Metadata Editor shows all the files. It will prompt you with an error message if the CSV contains errors or if any files describe in the CSV can not be found.
by Gaël Lafond (eAtlas) -
Verify the values for a few images, if wanted
You can double click any files from the list to verify its metadata.Editing the metadata of an image using the Image Metadata EditorEditing the metadata of an image using the Image Metadata Editor.
by Gaël Lafond (eAtlas) -
Apply the modifications to the images
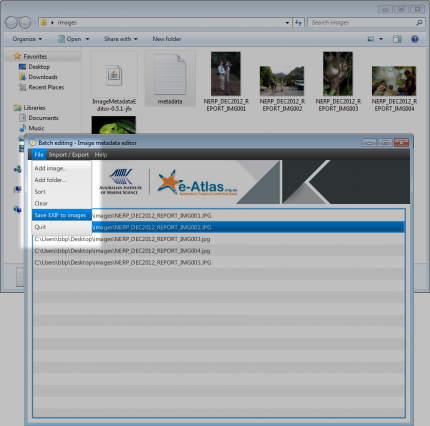
When you are satisfy with the result, apply all the metadata to the images using the "File" menu, "Save EXIF to images".Saving images metadata from the Image Metadata EditorSaving metadata from the Image Metadata Editor to the image files.
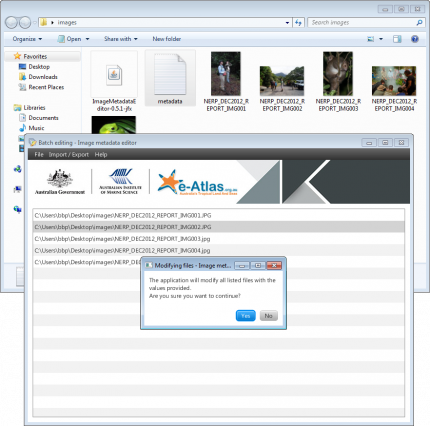
by Gaël Lafond (eAtlas)The metadata get applied once you approve the confirmation window.
Comfirming before saving images metadata from the Image Metadata EditorThe Image Metadata Editor will prompt you with this window before applying the metadata to all images.
by Gaël Lafond (eAtlas) -
Organise into Galleries
If you wish your photos to be organised into galleries on the eAtlas then please organise the photos into folders, each corresponding to a gallery. When you submit these files please provide a text description (a paragraph) to outline what the gallery contains. This text can simply be provided in the email to the eAtlas team. -
Submit the photos to the eAtlas.
Now that the photos have been tagged with metadata they are ready to be submitted to the eAtlas. These can be sent to the eAtlas using email (if the total size is less than approximately 30MB), by using Dropbox or Cloudstor+. If you use the cloud storage options then simply share the files with e-atlas@aims.gov.au.If you want the photos to be organised into galleries please include the description of each gallery.
Upon receiving the images the eAtlas team will check the metadata associated with the images to ensure that key attributes have been set, then they will upload each folder as a gallery in the system, associating the photos with the project that provided the images.


Notes
The Image Metadata Editor supports complex folder structures.
The example used in this document is very simple. Generaly, we tend to organise our images in folders, creating more complex structure. The Image Metadata Editor can also support those more complex structures.
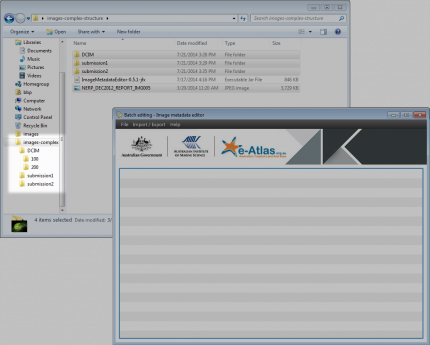
The Image Metadata Editor support more complex folder structure, with images spreaded across multiple nested folders.
Copy the Image Metadata Editor in the folder that contains all image folders, and drag and drop them into the application.
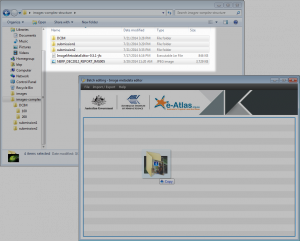
To load a complex folder structure, simply drag and drop all folders in the Image Metadata Editor. The application will show a warning if you accidently select files that are not JPEG images, or if some folders contains files other than JPEG.
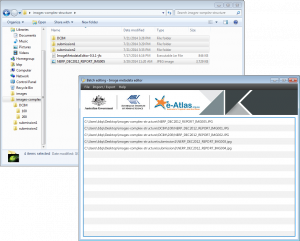
The Image Metadata Editor will navigate through all folders to find all JPEG files. The files listed in the application will only be the valid ones.
Just follow the guide from step 7. Edit the images metadata.
How to convert PNGs to JPEGs
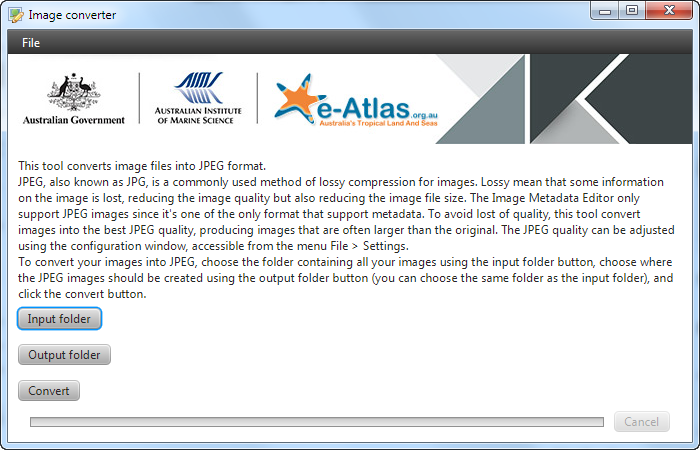
Since the Image Metadata Editor can only store the metadata in JPEGs we added a conversion tool that takes other file image types such as PNG and GIF and converts them to JPEGs. JPEG is a lossy file format that does not support transparency like PNG and GIFs and so the conversion is not lossless. As a result this conversion process may not be suitable for all types of imagery. If however the aim is to get PNG maps up on the eAtlas then this conversion will work just fine.
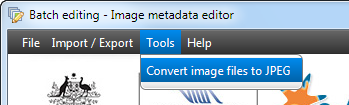
To start the the conversion tool select the Tools/Convert image files to JPEG menu item.
This will bring up the tool. It can be used to convert many files and can convert an entire directory tree of images.
After you have converted the images to JPEG you can then follow the steps above to attach metadata to the images.
How does the Image Metadata Editor work?
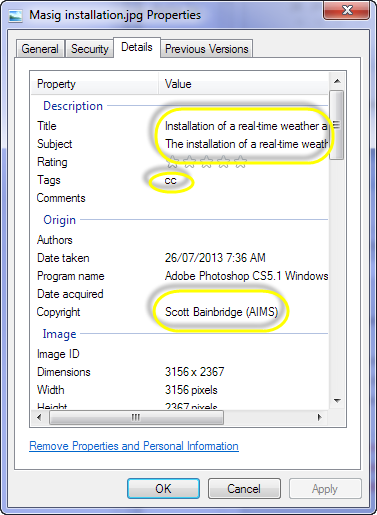
The eAtlas Image Metadata Editor application stores the metadata in the image itself using EXIF fields. This way the information will stay with the image as it is copied from computer to computer. The EXIF information can also be read from Windows and other photo applications.
OpenJDK release
Version 0.9.0 OpenJDK - 19/03/2021
OpenJDK is an Open Source version of Java. It's basically the same as Oracle Java, but it doesn't come with some of the extra packages and has a more open licence. Unfortunately, it does not come bundled with JavaFX, which is currently required by the ImageMetadataEditor tool. The library OpenJFX must be installed separately and added to the command line in order to work.
If you need to run this tool with OpenJDK, you will need to download the ImageMetadataEditor-0.9.0-OpenJDK.jar
Windows
Installing Open Java Development Kit (OpenJDK) 11
- Download Open Java Development Kit 11 (or later release)
Download link: https://jdk.java.net/archive/ - Install Open Java Development Kit 11 (instructions inspired from stackoverflow.com)
- Extract the files to:
C:\Program Files\Java\
You should have something like:C:\Program Files\Java\jdk-11.0.2 - Set a
Path- Open the
Control Paneland then selectSystem - Click
Advanced system settings - Click
Advancedand thenEnvironment Variables - Add the location of the
binfolder of the JDK installation to thePathvariable inSystem Variables
Example:C:\Program Files\Java\jdk-11.0.2\bin
- Open the
- Set
JAVA_HOME- Under
System Variables, clickNew - Enter the variable name as
JAVA_HOME - Enter the variable value as the installation path of the JDK (without the
binsub-folder)
Example:C:\Program Files\Java\jdk-11.0.2
- Under
- Reboot the computer
- Verify the installation
- Open a command prompt. You can find the command prompt by typing
cmdin the search bar - Type the command
java -version - The command should output something like this:
openjdk version "11.0.2" 2019-01-15

						OpenJDK Runtime Environment 18.9 (build 11.0.2+9)

						OpenJDK 64-Bit Server VM 18.9 (build 11.0.2+9, mixed mode)
- Open a command prompt. You can find the command prompt by typing
- Extract the files to:
Installing Open Java FX SDK (OpenJFX) 11
- Download Open Java FX SDK 11 (or later release)
Download link: https://gluonhq.com/products/javafx/
Docs: https://openjfx.io - Install Open Java FX SDK 11
- Extract the files to:
C:\Program Files\JavaFX\
You should have something like:C:\Program Files\JavaFX\javafx-sdk-11.0.2
- Extract the files to:
Running the app on OpenJDK 11
Running the app with OpenJDK is not as simple as clicking it. It needs to be executed from the command line
- Open a command prompt. You can find the command prompt by typing
cmdin the search bar - Navigate to the location the
ImageMetadataEditor-0.9.0-OpenJDK.jarwas downloaded.
For example, I have downloaded mine to the Desktop, so I have to type:
cd C:\Users\glafond\Desktop - Type the following java command in the command prompt, on one single line, and type enter:
java --module-path "C:\Program Files\JavaFX\javafx-sdk-11.0.2\lib" --add-modules javafx.base,javafx.controls -jar ImageMetadataEditor-0.9.0-OpenJDK.jar
Linux
The following commands are for Ubuntu. Other Debian distributions should work the same way. Other linux distributions built on different bases should work in a very similar fashion; the command to install a package apt-get and the package names may differ.
Installing Open Java Development Kit (OpenJDK) 11
sudo apt-get install openjdk-11-jre
Installing Open Java FX SDK (OpenJFX) 11
sudo apt-get install openjfx libopenjfx-java
Running the app on OpenJDK 11
java --module-path /usr/share/openjfx/lib --add-modules javafx.base,javafx.controls -jar ImageMetadataEditor-0.9.0-OpenJDK.jar
Source code available on GitHub.
| Attachment | Size |
|---|---|
| 914.96 KB | |
| 8.94 MB |